You are using an out of date browser. It may not display this or other websites correctly.
You should upgrade or use an alternative browser.
You should upgrade or use an alternative browser.
Photo Tutorial: Back to Basics/Improving Our Photos
- Thread starter Pea-n-Me
- Start date
PollyannaMom
I was a click-clack champ!!
- Joined
- May 16, 2006
Yum!
kimmar067
TAGS?? It's all about the 'likes' now!
- Joined
- Mar 7, 2001
...at Artist Point....Storybook Dining....Thanks, and back at you! Where was that?
Last edited:
Pea-n-Me
DIS Veteran
- Joined
- Jul 18, 2004
Note to self - must book it next time!...at Artist Point....the Storybook Dining....
MarkBarbieri
Semi-retired
- Joined
- Aug 20, 2006
Here are a couple of examples of extreme editing. I used some actions from Graphic River to transform an ordinary picture into something crazy looking.
For some context, this picture is from a town just north of Houston called The Woodlands. I've lived here for almost 20 years and the most snow we ever got was about 1" and that only happened once. I think I made this the day that the school systems panicked and closed schools ahead of what they thought was going to be a big freeze, but the temps only got down to about 37°F (about 3°C).

I don't remember why I made this next one. Maybe just because I thought it would look cool.

To be clear, I don't really have the Photoshop skills to do something like on my own. The actions I bought did almost all of the work for me and they made it fairly simple. And just it case it wasn't clear, these started as the same picture of two buildings on a boring, sunny day.
For some context, this picture is from a town just north of Houston called The Woodlands. I've lived here for almost 20 years and the most snow we ever got was about 1" and that only happened once. I think I made this the day that the school systems panicked and closed schools ahead of what they thought was going to be a big freeze, but the temps only got down to about 37°F (about 3°C).

I don't remember why I made this next one. Maybe just because I thought it would look cool.

To be clear, I don't really have the Photoshop skills to do something like on my own. The actions I bought did almost all of the work for me and they made it fairly simple. And just it case it wasn't clear, these started as the same picture of two buildings on a boring, sunny day.
Pea-n-Me
DIS Veteran
- Joined
- Jul 18, 2004
These are awesome!Here are a couple of examples of extreme editing. I used some actions from Graphic River to transform an ordinary picture into something crazy looking.
For some context, this picture is from a town just north of Houston called The Woodlands. I've lived here for almost 20 years and the most snow we ever got was about 1" and that only happened once. I think I made this the day that the school systems panicked and closed schools ahead of what they thought was going to be a big freeze, but the temps only got down to about 37°F (about 3°C).

I don't remember why I made this next one. Maybe just because I thought it would look cool.

To be clear, I don't really have the Photoshop skills to do something like on my own. The actions I bought did almost all of the work for me and they made it fairly simple. And just it case it wasn't clear, these started as the same picture of two buildings on a boring, sunny day.

PrincessInOz
Thanks for my avatar, Mary Jo!
- Joined
- Feb 8, 2010
Here are a couple of examples of extreme editing. I used some actions from Graphic River to transform an ordinary picture into something crazy looking.
For some context, this picture is from a town just north of Houston called The Woodlands. I've lived here for almost 20 years and the most snow we ever got was about 1" and that only happened once. I think I made this the day that the school systems panicked and closed schools ahead of what they thought was going to be a big freeze, but the temps only got down to about 37°F (about 3°C).

I don't remember why I made this next one. Maybe just because I thought it would look cool.

To be clear, I don't really have the Photoshop skills to do something like on my own. The actions I bought did almost all of the work for me and they made it fairly simple. And just it case it wasn't clear, these started as the same picture of two buildings on a boring, sunny day.
Amazing!!
I need to get back to putting some more effort to learn how to drive PS better. Those plug-ins are fantastic!
Pea-n-Me
DIS Veteran
- Joined
- Jul 18, 2004
Next up: Bokeh and Depth of Field
What is it?
Bokeh is the name for the blur that occurs as a result of a narrow depth of field.
Depth of the field describes the area of a scene that is deemed to be in focus.
https://www.apnphotographyschool.com/concepts/bokeh-vs-dof-the-difference-between-the-two/
https://www.slrphotographyguide.com/bokeh-dof/
https://www.studiobinder.com/blog/what-is-depth-of-field-definition/
Shallow dof with bokeh is one of my favorite aspects of photography and one I find the most fun to shoot. It is relatively easy to achieve on a manual camera, but on a phone, using Portrait mode can often give you a similar effect, although you need to step back from your subject and make sure you have plenty of light.
Manual

Phone

Deep depth of field is when everything is in focus, typically used with landscape photography.
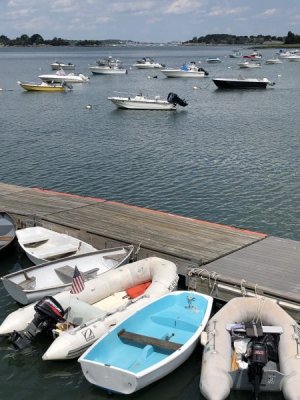
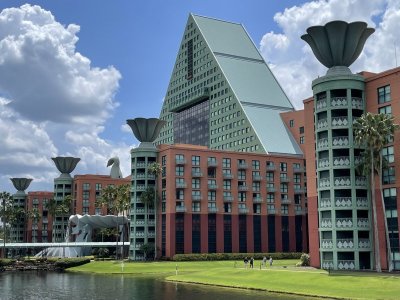
Let’s see some examples of depth of field.
What is it?
Bokeh is the name for the blur that occurs as a result of a narrow depth of field.
Depth of the field describes the area of a scene that is deemed to be in focus.
https://www.apnphotographyschool.com/concepts/bokeh-vs-dof-the-difference-between-the-two/
https://www.slrphotographyguide.com/bokeh-dof/
https://www.studiobinder.com/blog/what-is-depth-of-field-definition/
Shallow dof with bokeh is one of my favorite aspects of photography and one I find the most fun to shoot. It is relatively easy to achieve on a manual camera, but on a phone, using Portrait mode can often give you a similar effect, although you need to step back from your subject and make sure you have plenty of light.
Manual

Phone

Deep depth of field is when everything is in focus, typically used with landscape photography.


Let’s see some examples of depth of field.
- Joined
- Oct 2, 1999
Back to Extreme Editing - I'm sure I have more buried somewhere but one example I found while not extreme is obviously fake.  I took a snowy backyard scene in Maryland and created a false reflection using a PanosFX program. There are scads of interesting mostly free special effects programs in PanosFX. Later I'll look for a few more examples.

 I took a snowy backyard scene in Maryland and created a false reflection using a PanosFX program. There are scads of interesting mostly free special effects programs in PanosFX. Later I'll look for a few more examples.
- Joined
- Oct 2, 1999
I love DOF and Bokeh too! Two of my favorites Bokeh below were both taken with my Canon T6s.
Colorado papers always announce the annual Painted Lady butterfly migration and I caught this scene in our front yard one year.

One of our late Spring snowstorms (falls fast and wet and melts within a day) left this Mickey icon in one of our front yard bushes.

Colorado papers always announce the annual Painted Lady butterfly migration and I caught this scene in our front yard one year.

One of our late Spring snowstorms (falls fast and wet and melts within a day) left this Mickey icon in one of our front yard bushes.

Last edited:
MarkBarbieri
Semi-retired
- Joined
- Aug 20, 2006
Here's a similarly faked flood in our kid's computer room.Back to Extreme Editing - I'm sure I have more buried somewhere but one example I found while not extreme is obviously fake.I took a snowy backyard scene in Maryland and created a false reflection using a PanosFX program. There are scads of interesting mostly free special effects programs in PanosFX. Later I'll look for a few more examples.
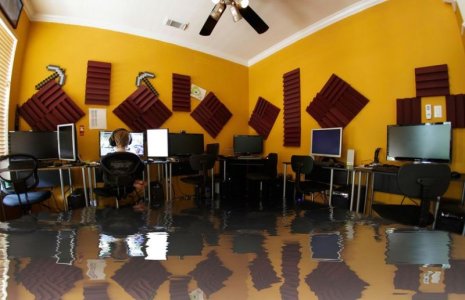
That room has had an interesting history. I think it is officially a "dining room" on our floor plan, but there is already a place next to the kitchen for dining and we couldn't understand why anyone would want to dedicate two separate rooms to dining.
We put a computer in the room for the kids to use. I didn't like the idea of young kids having a computer in their room for a variety of reasons and this seemed like a good place for it. Then we wanted a second computer and I had the idea of building a wall mounted computer with exposed parts to help the kids understand the internals of a computer better. After thinking about different options for fabricating it with sheet metal or a wood backing board, I decided to go simple and built it with components strapped to a pizza box. Sounds crazy, but it worked.
Even though we only had two kids, neighbor kids frequently came over and wanted to play computer games as well, so we decided to expand. We bought a bunch of components and had the kids assemble a few more computers. We ended up with six PCs in the room and it became the gaming hangout. I loved it because it took a traditionally solitary activity of playing computer games and turned it into a social activity. And, my kids learned to build PCs and learned how to support them. Now one of them works as a professional developer and the other is working on his computer science degree.
And the room eventually did flood (overflowing washing machine), but only about an inch deep and the computers were already gone. Now it has a rowing machine, a squat rack, and a bench, and we use it as a small workout room. And those sound baffles didn't help at all.
MarkBarbieri
Semi-retired
- Joined
- Aug 20, 2006
This is a shallow DOF shot that I took of a friend's son testing for his black belt. I shot it with an 85mm f/1.2 lens at f/2. If I had to do it again with the same equipment, I would have shot at f/2.8 or maybe even f/4 instead. I'm very happy with how it came out, but this was the "Big Moment" in the test and shooting that wide was risky. The picture is better for it, but with such shallow DOF I took too much risk that I would miss focus and end up without a good shot. With my new camera, I trust the eye detecting autofocus a lot more.

Canon 5D Mark III, 85mm, f/2, 1/400, ISO 1600.
It is much easier getting shallow DOF with a telephoto lens than it is with a wide angle lens. Shooting at f/2.8 with a relatively near subject and a 200mm lens will give you shallow DOF. Shooting at f/2.8 with a wide angle lens won't unless you are very close to your subject. That makes it hard to shoot wide and use DOF to isolate your subject. Here is an example shot where I got close to my subject (which makes it easier to blur the background) and shot with my aperture wide open.

Canon 7D, 24mm, f/1.4, 1/100s, ISO 400
And another at a sweet sixteen party. I wanted to show the two girls and the setting they were in, but the background was very distracting, so I wanted it blurred.
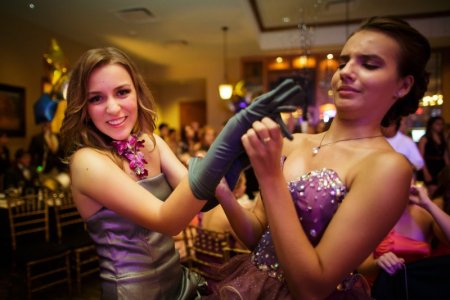
Canon 5D Mark III, 24mm, f/1.4, 1/160s, ISO 3200
You would think that taking a picture with a super small aperture, like f/32 would mean that EVERYTHING is in focus. Not so. Remember that your DOF gets smaller the closer you are to your subject. This is a macro shot taken very close but with a very narrow aperture. Even though I shot with a narrow aperture, the front and back of the little car are out of focus. The best way to deal with this is to take a bunch of pictures focusing on a slightly different part of your subject with each picture. You combine all of them using a program that does what is called "focus stacking". That takes the sharpest parts of each picture and combines them so that you get more stuff in focus. When you see pictures of tiny things like bugs, that is often what they are doing.

Canon 5D Mark II, 100mm, f/32, 8s, ISO 200
Here's an example of a landscape with a lot of DOF. Generally speaking, you want to avoid using apertures above about f/11 because, while they give you more DOF, the small aperture hurts the sharpness of your image. It's a tradeoff. If you really want the best possible landscape with lots of DOF, use the focus stacking technique by taking several pictures and combining them.
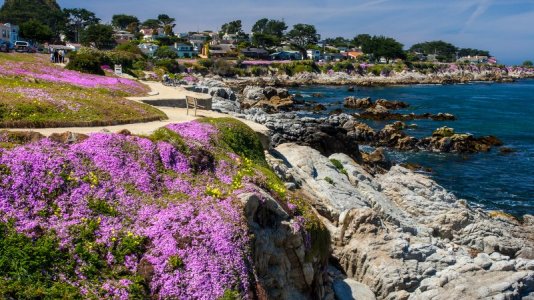
Canon 1D Mark II, 38mm, f/18, 1/30s, ISO 200
There is a fun trick that you can do with a camera with a wide aperture lens. It works best with a prime lens rather than a zoom because you really want the aperture to open wide. You cut out a shape and cover the lens with it. That forces the incoming light to go through your cutout shape. The out of focus stuff in the background takes on that shape. It works best with lights in the background. Here are some of our Christmas lights shot through a Mickey cutout I made with a 4"x4" piece of wood and a laser cutter. I mounted the cutout into a Lee filter holder on the front of my lens.

Canon R5, 200mm, f/2.8, 1/200s, ISO 6400 And just in case it wasn't clear, those are ordinary Christmas lights shot through a Mickey Mouse shaped cutout.

Canon 5D Mark III, 85mm, f/2, 1/400, ISO 1600.
It is much easier getting shallow DOF with a telephoto lens than it is with a wide angle lens. Shooting at f/2.8 with a relatively near subject and a 200mm lens will give you shallow DOF. Shooting at f/2.8 with a wide angle lens won't unless you are very close to your subject. That makes it hard to shoot wide and use DOF to isolate your subject. Here is an example shot where I got close to my subject (which makes it easier to blur the background) and shot with my aperture wide open.

Canon 7D, 24mm, f/1.4, 1/100s, ISO 400
And another at a sweet sixteen party. I wanted to show the two girls and the setting they were in, but the background was very distracting, so I wanted it blurred.

Canon 5D Mark III, 24mm, f/1.4, 1/160s, ISO 3200
You would think that taking a picture with a super small aperture, like f/32 would mean that EVERYTHING is in focus. Not so. Remember that your DOF gets smaller the closer you are to your subject. This is a macro shot taken very close but with a very narrow aperture. Even though I shot with a narrow aperture, the front and back of the little car are out of focus. The best way to deal with this is to take a bunch of pictures focusing on a slightly different part of your subject with each picture. You combine all of them using a program that does what is called "focus stacking". That takes the sharpest parts of each picture and combines them so that you get more stuff in focus. When you see pictures of tiny things like bugs, that is often what they are doing.

Canon 5D Mark II, 100mm, f/32, 8s, ISO 200
Here's an example of a landscape with a lot of DOF. Generally speaking, you want to avoid using apertures above about f/11 because, while they give you more DOF, the small aperture hurts the sharpness of your image. It's a tradeoff. If you really want the best possible landscape with lots of DOF, use the focus stacking technique by taking several pictures and combining them.

Canon 1D Mark II, 38mm, f/18, 1/30s, ISO 200
There is a fun trick that you can do with a camera with a wide aperture lens. It works best with a prime lens rather than a zoom because you really want the aperture to open wide. You cut out a shape and cover the lens with it. That forces the incoming light to go through your cutout shape. The out of focus stuff in the background takes on that shape. It works best with lights in the background. Here are some of our Christmas lights shot through a Mickey cutout I made with a 4"x4" piece of wood and a laser cutter. I mounted the cutout into a Lee filter holder on the front of my lens.

Canon R5, 200mm, f/2.8, 1/200s, ISO 6400 And just in case it wasn't clear, those are ordinary Christmas lights shot through a Mickey Mouse shaped cutout.
PrincessInOz
Thanks for my avatar, Mary Jo!
- Joined
- Feb 8, 2010
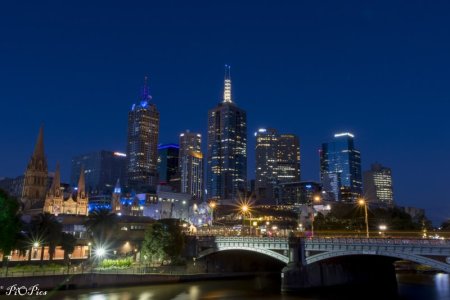
Depth of Field......
Melbourne skyline, taken at f/16. Its a night time shot; and I went with the smaller aperture setting so that my lights twinkle.
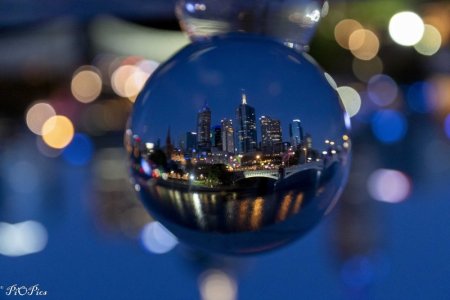
....and Bokeh
Shooting through a crystal ball at f/2.8. The shallow DoF and the city lights have rendered the lights into spherical orbs of colour. At this aperture setting, you can just about make out the bridge and the tall buildings in the background.
NOTE: When you shoot through the crystal ball, the image is upside down. I rotated the image in LR so that the city is the right way up.


Melbourne skyline, taken at f/16. Its a night time shot; and I went with the smaller aperture setting so that my lights twinkle.

....and Bokeh
Shooting through a crystal ball at f/2.8. The shallow DoF and the city lights have rendered the lights into spherical orbs of colour. At this aperture setting, you can just about make out the bridge and the tall buildings in the background.
NOTE: When you shoot through the crystal ball, the image is upside down. I rotated the image in LR so that the city is the right way up.


Last edited:
Pea-n-Me
DIS Veteran
- Joined
- Jul 18, 2004
I love your depth of field examples. If any more turn up, post them!
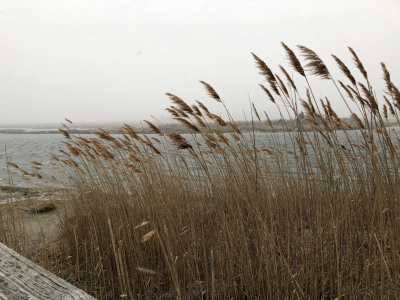
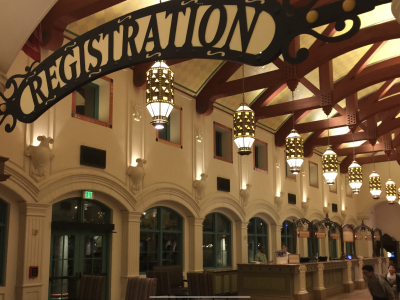
Next up, let’s talk about Patterns.
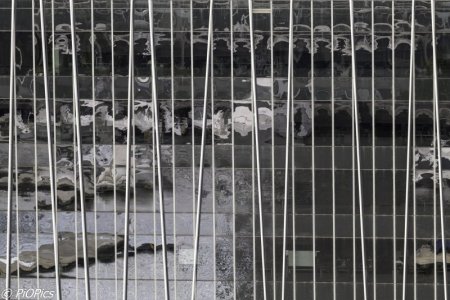
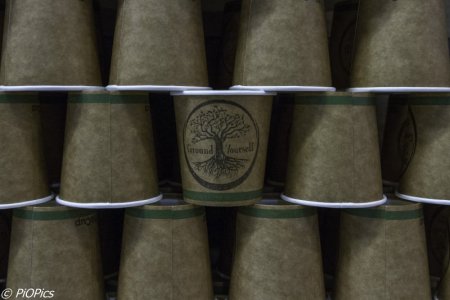
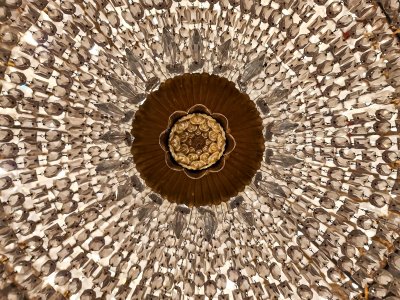
“What is Pattern in Photography? Pattern in Photography is a regularity within a scene. It's elements of the scene that repeat themselves in a predictable way. Pattern can be found everywhere and is commonly seen within shapes, colours or textures.”
https://www.photoworkout.com/patterns-in-photography/
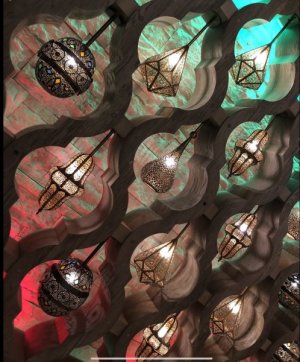

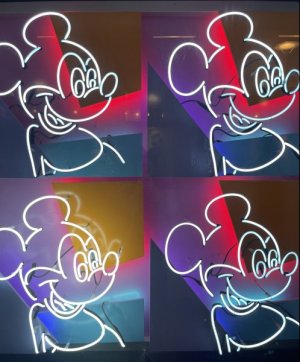
Let’s see your patterns!
Next up, let’s talk about Patterns.
“What is Pattern in Photography? Pattern in Photography is a regularity within a scene. It's elements of the scene that repeat themselves in a predictable way. Pattern can be found everywhere and is commonly seen within shapes, colours or textures.”
https://www.photoworkout.com/patterns-in-photography/


Let’s see your patterns!
PrincessInOz
Thanks for my avatar, Mary Jo!
- Joined
- Feb 8, 2010
MarkBarbieri
Semi-retired
- Joined
- Aug 20, 2006
GET A DISNEY VACATION QUOTE
Dreams Unlimited Travel is committed to providing you with the very best vacation planning experience possible. Our Vacation Planners are experts and will share their honest advice to help you have a magical vacation.
Let us help you with your next Disney Vacation!
Dreams Unlimited Travel is committed to providing you with the very best vacation planning experience possible. Our Vacation Planners are experts and will share their honest advice to help you have a magical vacation.
Let us help you with your next Disney Vacation!
New DISboards Threads
- Replies
- 12
- Views
- 162


 ).
).


